Mirror, Mirror on the Wall |
An adventure in the wondrous world of Google technologies, or how Google enabled me to re-create (some of) the development experience for Glass™.
For many people their Glass journey started at Google I/O 2012 where they were able to sign up for the Glass Explorers program. Now that program was (and still is) limited to the US only which excluded me (and many others) but that wouldn't stop me. My journey started a little bit later with this video where the first mention of the Mirror API as Discovery-based API caught my interest, since I already had done quite a bit of work with other Discovery-based APIs.
Details about the API itself were sparse and while several Glass Explorers were happily hacking away at the Glass Foundry I was eagerly waiting for more information which wouldn't come out until this presentation at SXSW, information of which was first only available via some shared snapshots from tech blogs (Engadget, TechCrunch), and later as video recording.
Based on this information and my previous experiences with Google Cloud Endpoints and Discovery-based APIs I started my project to create a mirror of the Mirror API that could be used for testing potential Glassware, including a browser based Glass emulator, for all the people who like me couldn't be part of the Glass Explorer program, and had a working prototype up and running before the official documentation was released a bit later.
Since then I have worked (with the help of several people) to make my Mirror API emulator as close a match of the real Mirror API as possible and I want to focus on some of the techniques and problems I've run across on the way.
Please note that I won't give complete code samples but only extract and simplify the important bits. Refer to my Github repository (and its history) for complete code.
Discovery-based APIs can typically be defined by two components, schemas that define the objects/messages that are exchanged between client and server, and methods that define the actual endpoints (URLs) to be called with expected input and output schemas and parameters.
In the case of the Mirror API the most important schema is the TimelineItem with methods to insert, update, delete, get and list them. For the sake of this article we're going to concentrate on a subset of the properties of a TimelineItem and only look at the insert and list methods.
If we follow the docs and sample there are several things we have to do to create our API.
ProtoRPC Message classes define what kind of information will be exchanged between Client and API Server.
| class TimelineItemMessage(messages.Message): |
| """ProtoRPC message definition to represent one timeline item.""" |
| id = messages.IntegerField(1) |
| text = messages.IntegerField(2) |
| created = messages.StringField(3) |
| class TimelineListRequest(messages.Message): |
| """ProtoRPC message definition to represent a timeline list query.""" |
| limit = messages.IntegerField(1, default=100) |
| class TimelineListResponse(messages.Message): |
| """ProtoRPC message definition to represent the response to a timeline list query.""" |
| items = messages.MessageField(TimelineItemMessage, 1, repeated=True) |
We also have to define the datastore models that are used to store the timeline items, and methods to create entities from messages and vice-versa.
| class TimelineItem(ndb.Model): |
| """ |
| Datastore model for timeline items. |
| Since the created property is auto_now_add=True, items will document when |
| they were inserted immediately after being stored. |
| """ |
| text = ndb.StringProperty() |
| created = ndb.DateTimeProperty(auto_now_add=True) |
| user = ndb.UserProperty(required=True) |
| @property |
| def timestamp(self): |
| """Property to format a datetime object as string for messages.""" |
| return self.when.strftime(TIME_FORMAT_STRING) |
| def to_message(self): |
| """ |
| Turns the TimelineItem entity into a ProtoRPC object. |
| This is necessary so the entity can be returned in an API request. |
| Returns: An instance of TimelineItemMessage with the ID set to the |
| datastore ID of the current entity. |
| """ |
| return TimelineItemMessage(id=self.key.id(), |
| text=self.text, |
| created=self.timestamp) |
| @classmethod |
| def put_from_message(cls, message): |
| """ |
| Gets the currently authenticated user and inserts a new timeline item for them |
| Args: message: A TimelineItemMessage instance to be inserted. |
| Returns: The TimelineItem entity that was inserted. |
| """ |
| current_user = get_endpoints_current_user() |
| entity = cls(text=message.text, user=current_user) |
| entity.put() |
| return entity |
| @classmethod |
| def query_current_user(cls): |
| """ |
| Creates a query for the timeline items of the current user. |
| Returns: |
| An ndb.Query object bound to the current user. This can be used |
| to filter for other properties or order by them. |
| """ |
| current_user = get_endpoints_current_user() |
| return cls.query(cls.user == current_user) |
And finally we have to define the actual API methods.
| @endpoints.api(name="mirror", version="v1", |
| description=API_DESCRIPTION, |
| allowed_client_ids=[CLIENT_ID, endpoints.API_EXPLORER_CLIENT_ID]) |
| class MirrorApi(remote.Service): |
| """Class which defines the Mirror API v1.""" |
| @endpoints.method(TimelineListRequest, TimelineListResponse, |
| path="timeline", http_method="GET", |
| name="timeline.list") |
| def timeline_list(self, request): |
| """ |
| List timeline items for the current user. |
| Args: |
| request: An instance of TimelineListRequest parsed from the API request. |
| Returns: |
| An instance of TimelineListResponse containing the cards for the |
| current user returned in the query. |
| """ |
| query = TimelineItem.query_current_user() |
| query = query.order(-TimelineItem.created) |
| items = [entity.to_message() for entity in query.fetch(request.limit)] |
| return TimelineListResponse(items=items) |
| @endpoints.method(TimelineItemMessage, TimelineItemMessage, |
| path="timeline", http_method="POST", |
| name="timeline.insert") |
| def timeline_insert(self, request): |
| """ |
| Insert a new timeline item for the current user. |
| Args: |
| request: An instance of TimelineItemMessage parsed from the API request. |
| Returns: |
| An instance of TimelineItemMessage containing the information inserted, |
| the time the item was inserted and the ID of the item. |
| """ |
| entity = TimelineItem.put_from_message(request) |
| return entity.to_message() |
Now there seem to be quite a bit of duplicate definitions with ProtoRPC messages and datastore models sharing the same properties, and a whole lot of extra methods necessary to transform information back and forth, right? Right! And you can imagine that with more properties and schemas added this will soon become an untamable beast, especially when you want to add extra properties. But fear not! To the rescue comes our knight in shining armour +Danny Hermes with his awesome work on the Endpoints Proto Datastore API that allows you to directly interact with datastore model entities in your API methods without worrying about the underlying ProtoRPC requests and messages.
Let's have a look at the much cleaner and shorter code of our API.
| class TimelineItem(EndpointsModel): |
| """ |
| Datastore model for timeline items. |
| Since the created property is auto_now_add=True, items will document when |
| they were inserted immediately after being stored. |
| """ |
| _message_fields_schema = ("id", "text", "created") |
| text = ndb.StringProperty() |
| created = EndpointsDateTimeProperty(auto_now_add=True) |
| user = EndpointsUserProperty(required=True, raise_unauthorized=True) |
| @endpoints.api(name="mirror", version="v1", |
| description=API_DESCRIPTION, |
| allowed_client_ids=[CLIENT_ID, endpoints.API_EXPLORER_CLIENT_ID]) |
| class MirrorApi(remote.Service): |
| """Class which defines the Mirror API v1.""" |
| @TimelineItem.query_method(query_fields=("limit", "pageToken"), |
| user_required=True, |
| path="timeline", name="timeline.list") |
| def timeline_list(self, query): |
| """ |
| List timeline items for the current user. |
| Args: |
| query: An ndb Query object for Timeline items. |
| Returns: |
| An updated ndb Query object for the current user. |
| """ |
| query = query.order(-TimelineItem.when) |
| return query.filter(TimelineItem.user == endpoints.get_current_user()) |
| @TimelineItem.method(user_required=True, |
| path="timeline", name="timeline.insert") |
| def timeline_insert(self, item): |
| """ |
| Insert a new timeline item for the current user. |
| Args: |
| item: An instance of TimelineItem parsed from the API request. |
| Returns: |
| An instance of TimelineItem containing the information inserted, |
| the time the item was inserted and the ID of the item. |
| """ |
| item.put() |
| return item |
Yup, that's it, less than half the code we needed without the Endpoints Proto Datastore API and much easier to maintain. And with this the API is ready to be tested (but far from complete).
While you can use the API Explorer (automatically provided by the Google APIs Discovery Service at https://your-app.appspot.com/_ah/api/explorer) to test your API, it's much more fun and useful if you can actually see what the timeline items look like.
For that reason I created a browser-based emulator, using the samples and css provided at the Google Mirror API Playground as reference.
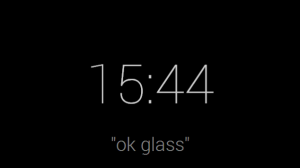

I also added some fun features using experimental HTML5 features, like the Web Speech API to allow voice commands ("take a picture") or the UserMedia API to allow actually taking pictures via a connected webcam.
The emulator uses the Google APIs Client Library for JavaScript to communicate with our API, with some extra "internal" functions added to the API which wouldn't normally be part of the Mirror API but are necessary to simulate the communication between a Glass device (i.e. the emulator) and the API.
The emulator also uses the Google+™ Sign-In Button with the server-side flow for authentication. While originally the client-side flow was enough for the emulator to call the API some of the advanced features described further below, required switching to the server-side flow. Most of the API calls are still done from the client-side.
Here the essential code parts for setting up the authentication and using the client library.
(some parts will be filled dynamically when the page is rendered server-side)
First we will need to include some markup for the Google+ Sign-in button somewhere on the page.
| <div id="signin"> |
| <button class="g-signin" |
| data-scope="https://www.googleapis.com/auth/plus.login |
| https://www.googleapis.com/auth/userinfo.email" |
| data-clientId="{{ client_id }}" |
| data-callback="onSignInCallback" |
| data-theme="dark" |
| data-cookiepolicy="single_host_origin"> |
| </button> |
| </div> |
https://www.googleapis.com/auth/plus.login is the normal scope for authentication with the Google+ Sign-in button, while https://www.googleapis.com/auth/userinfo.email is necessary for working with Google Cloud Endpoints.
{{ client_id }} is the Client ID you get in the Google APIs Console for your project.
onSignInCallback is a function (defined below), which will be called on success (or failure) of the authentication.
At the end of the page we add some code to load the necessary Javascript for the Sign-in button and client library functionality
| <script type="text/javascript"> |
| (function(global) { |
| var po, s; |
| po = global.document.createElement("script"); |
| po.type = "text/javascript"; po.async = true; |
| po.src = "https://plus.google.com/js/client:plusone.js"; |
| s = global.document.getElementsByTagName("script")[0]; |
| s.parentNode.insertBefore(po, s); |
| }(this)); |
| </script> |
Now for the onSignInCallback function which will receive authorization code and OAuth token after the user successfully signed in or an error message otherwise. Upon a successful authentication we call a function connect that will send the one-time authorization code via a POST request to our server.
| function onSignInCallback(authResult) { |
| if (!!authResult.access_token) { |
| // authentication successful |
| connect(authResult.code); |
| } else if (authResult.error) { |
| console.log("Authentication error: " + authResult.error); |
| // inform the user about the error in some way |
| } |
| } |
Probably the most important part of this code transfer from client to server (in addition to using HTTPS which is easy since you get that automatically with App Engine) is the anti-request forgery state token {{ state }}. This random string is generated and inserted into the script server-side when the page is loaded, saved in the current session and then compared when the client sends the connection request to make sure the request comes from the same user who opened the page and not from some malicious script.
| function connect(code) { |
| var xhr = new XMLHttpRequest(); |
| xhr.onreadystatechange = function () { |
| if (xhr.readyState === 4) { |
| if (xhr.status === 200) { |
| // Successfully connected to server |
| // Update UI and start emulator |
| } else { |
| console.log("Connection error: " + xhr.responseText); |
| } |
| } |
| }; |
| xhr.open("POST", "/connect?state={{ state }}", true); |
| xhr.setRequestHeader("Content-Type", "application/octet-stream; charset=utf-8"); |
| xhr.send(code); |
| } |
Now for the related server side code. First the request handler for loading the actual page:
| class MainHandler(webapp2.RequestHandler): |
| def get(self): |
| """Renders the Glass emulator""" |
| # Create a state token to prevent request forgery. |
| # Store it in the session for later validation. |
| state = ''.join(random.choice(string.ascii_uppercase + string.digits) |
| for x in xrange(32)) |
| self.session["state"] = state |
| # Render the page with the necessary parameters |
| template = JINJA.get_template("emulator/templates/glass.html") |
| self.response.out.write(template.render( |
| {"state": state, "client_id": CLIENT_ID, "discovery_url": DISCOVERY_URL} |
| )) |
And the request handler to accept the connection POST requests. This uses the Google APIs Client Library for Python to handle the code exchange flow. We'll extend this handler with a bit more useful functionality in a bit.
| class ConnectHandler(webapp2.RequestHandler): |
| """Handles connection requests coming from the emulator""" |
| def post(self): |
| """Exchange the one-time authorization code for a token and verify user.""" |
| self.response.content_type = "application/json" |
| state = self.request.get("state") |
| code = self.request.body |
| # Compare anti-request forgery state token to the one stored in the session |
| if state != self.session.get("state"): |
| self.response.status = 401 |
| self.response.out.write(createError(401, "Invalid state parameter")) |
| return |
| try: |
| # Upgrade the authorization code into a credentials object |
| oauth_flow = flow_from_clientsecrets('client_secrets.json', scope='') |
| oauth_flow.redirect_uri = 'postmessage' |
| credentials = oauth_flow.step2_exchange(code) |
| except FlowExchangeError: |
| self.response.status = 401 |
| self.response.out.write(createError(401, "Failed to upgrade the authorization code.")) |
| return |
| # Store credentials for later use |
| self.session["credentials"] = credentials |
| self.response.status = 200 |
| self.response.out.write(createMessage({"success": true})) |
That's actually the easiest part. First thing we want to do is to load the client libraries we will be using. For this we can use the gapi.client.load function which takes the name and version of the API as a parameter, as well as a callback function which will be called when the client library has finished loading. For our own Mirror API clone we also have to provide an extra parameter to tell the loader where the API is hosted. The needed Discovery URL looks like https://your-app.appspot.com/_ah/api.
| gapi.client.load("mirror", "v1", function () { |
| // client library finished loading, we can start using it now |
| }, "{{ discoveryUrl }}"); |
Since we went through the Sign-in button flow all calls to the API will automatically by authenticated with the OAuth access token.
Here's a call to our API to retrieve a list of recent timeline items:
| gapi.client.mirror.timeline.list().execute(function (result) { |
| console.log(result); |
| // result.items will be an array of timeline items |
| // that we can iterate through and display in the emulator |
| }); |
And here a call to add a new timeline item:
| var new_item = {"text": "I'm a new item!"}; |
| gapi.client.mirror.timeline.insert({"resource": new_item}).execute(function (result) { |
| console.log(result); |
| // result will be the full timeline item |
| // with id and created fields filled by our API |
| }); |
You will also want to load the client library for Google+ with gapi.client.load("plus", "v1", callback) and then use the gapi.client.plus.people.get({"userId": "me"}) method to retrieve and display information about the authenticated user.
Following Google+ developer guidelines we also provide a button to revoke access and disconnect from our app
A simple button somewhere, that will be shown after a successful sign-in.
| <div id="signout" style="display: none;"> |
| <button id="signout_button">Sign-out and disconnect</button> |
| </div> |
When the button is clicked we send a request to our server.
| document.getElementById("signout_button").onclick = function (code) { |
| var xhr = new XMLHttpRequest(); |
| xhr.onreadystatechange = function () { |
| if (xhr.readyState === 4) { |
| if (xhr.status === 200) { |
| // Successfully disconnected from server |
| // Reset UI to logged out state |
| } else { |
| console.log("Disconnection error: " + xhr.responseText); |
| } |
| } |
| }; |
| xhr.open("POST", "/disconnect", true); |
| xhr.send(); |
| }; |
On the server side we send a request to accounts.google.com to revoke the current token. In this step you would also delete any user-related information you have stored.
| class DisconnectHandler(webapp2.RequestHandler): |
| """Handles disconnection requests coming from the emulator""" |
| def post(self): |
| """Revoke current user's token and reset their session.""" |
| self.response.content_type = "application/json" |
| credentials = self.session.get("credentials") |
| if credentials is None: |
| self.response.status = 401 |
| self.response.out.write(createError(401, "Invalid credentials.")) |
| return |
| # Execute HTTP GET request to revoke current token. |
| access_token = credentials.access_token |
| url = "https://accounts.google.com/o/oauth2/revoke?token=%s" % access_token |
| h = httplib2.Http() |
| result = h.request(url, 'GET')[0] |
| if result["status"] == "200": |
| # Reset the user's session. |
| self.session["credentials"] = None |
| self.response.status = 200 |
| self.response.out.write(createMessage({"success": true})) |
| return |
| self.response.status = 400 |
| self.response.out.write(createError(400, "Failed to revoke token.")) |
For further improvements you would create a new anti-request forgery state token in the DisconnectHandler and return it in the response to the client, to be used for a new sign-in attempt.
So while having a working emulator is nice, the question is how to actually get new cards into the emulator. For now we can use the API Explorer for adding new cards, but then how does the emulator know when new cards are there? Of course frequently polling the timeline.list method would be an option but also produce lots of unnecessary traffic and eat at our App Engine quota. And while setting the polling interval higher takes care of lowering the traffic it also means that timeline cards will arrive later.
In comes Dr. Dolittle the Channel API to relieve us of this problem. This App Engine service creates a persistent connection between a JavaScript client (our emulator) and a server-side application (our API), allowing us to send messages to the client without the use of polling. And the usage is really simple.
We need some unique id to identify a channel, and since channels in our case will be dependent on a user, we can use their email address for this. We could also use their Google+ ID but the email address is more easily accessible from Cloud Endpoints (at least at the moment). We create the channel during the connection request from the client in our ConnectHandler.
| from google.appengine.api import channel |
| class ConnectHandler(webapp2.RequestHandler): |
| def post(self): |
| self.response.content_type = "application/json" |
| # code-exchange happens here as shown above |
| # ... |
| # Retrieve token info which will include the email address |
| access_token = credentials.access_token |
| url = ("https://www.googleapis.com/oauth2/v1/tokeninfo?access_token=%s" % access_token) |
| h = httplib2.Http() |
| result = json.loads(h.request(url, 'GET')[1]) |
| # If there is an error in the response, abort. |
| if result.get("error") is not None: |
| self.response.status = 400 |
| self.response.out.write(json.dumps(result.get("error"))) |
| return |
| # Create the channel and send channel token to client |
| token = channel.create_channel(result["email"]) |
| self.response.status = 200 |
| self.response.out.write(createMessage({"success": true, "token": token})) |
On the client-side we need to include the /_ah/channel/jsapi JavaScript and then extend the connect function from above to retrieve and use the token from the serverresponse.
| function connect(code) { |
| var xhr = new XMLHttpRequest(); |
| xhr.onreadystatechange = function () { |
| var response; |
| if (xhr.readyState === 4) { |
| if (xhr.status === 200) { |
| response = JSON.parse(xhr.responseText); |
| openChannel(response.token); |
| } else { |
| console.log("Connection error: " + xhr.responseText); |
| } |
| } |
| }; |
| xhr.open("POST", "/connect?state={{ state }}", true); |
| xhr.setRequestHeader("Content-Type", "application/octet-stream; charset=utf-8"); |
| xhr.send(code); |
| } |
Using the token we connect to the channel and set-up some event callbacks, the most important one being onmessage that is called for each message we send from the server.
| function openChannel(token) { |
| var channel, socket; |
| channel = new goog.appengine.Channel(token); |
| socket = channel.open(); |
| socket.onopen = function () { |
| console.log("Channel connected"); |
| }; |
| socket.onerror = function (e) { |
| console.log("Channel error", e); |
| }; |
| socket.onclose = function () { |
| console.log("Channel closed"); |
| }; |
| socket.onmessage = handleChannelMessage; |
| } |
The important time when we want to update the emulator, is when new timeline items are inserted (or updated or deleted) so we will update our timeline.insert API method slightly. To keep messages small we will only send the id of the new item via the channel, and then let the emulator/client decide whether they need to retrieve the full timeline item via the API.
| @TimelineItem.method(user_required=True, |
| path="timeline", name="timeline.insert") |
| def timeline_insert(self, item): |
| item.put() |
| # Since the authenticated user is stored with the timeline item |
| # we can directly get the email address from the User entity |
| channel_id = item.user.email() |
| message = json.dumps({"id": item.id}) |
| channel.send_message(channel_id, message) |
| return card |
On the client-side we extract the id from the message, use the API to retrieve the full timeline item and use it to update the emulator.
| function handleChannelMessage(message) { |
| var data; |
| if (message && message.data) { |
| data = JSON.parse(message.data); |
| mirror.timeline.get({"id": data.id}).execute(function (result) { |
| console.log(result); |
| // result will be the full timeline item |
| }); |
| } |
| } |
So now the emulator is updated in almost real-time whenever the timeline changes, on to the next bit.
An important part of the Mirror API are attachments, any photos and videos taken with Glass are attachments, and they are handled via media up-/downloads. Now the problem is that currently media uploads aren't supported by Cloud Endpoints so I had to come up with a different solution, using the Blobstore and custom up- and download handlers
There are several steps we have to go through to get this working.
Request bodies can come in two forms, either multipart bodies with both the timeline item information (text, ...) and the binary attachment data together, or just the binary attachment. For decoding multipart bodies we can use the Python email library.
| content_type = self.request.content_type |
| if content_type == "multipart/related" or content_type == "multipart/mixed": |
| # Attach content-type header to body so the email library can decode it correctly |
| message = "Content-Type: " + self.request.headers["Content-Type"] + "\r\n" |
| message += self.request.body |
| msg = email.message_from_string(message) |
| if msg.is_multipart(): |
| for payload in msg.get_payload(): |
| content_type = payload.get_content_type() |
| if content_type.startswith("image/") or |
| content_type.startswith("audio/") or |
| content_type.startswith("video/"): |
| attachment_type = content_type |
| attachment = payload.get_payload(decode=True) |
| elif content_type == "application/json": |
| iteminfo = json.loads(payload.get_payload()) |
| elif content_type.startswith("image/") or |
| content_type.startswith("audio/") or |
| content_type.startswith("video/"): |
| # No multipart body, directly use the request body as attachment |
| attachment_type = content_type |
| attachment = self.request.body |
| iteminfo = {} |
We're going to use our own Mirror API via the Google APIs Client Library for Python to insert a timeline item. Since we are going to use the same authentication token that initated the upload request, this will also check if the current user is actually using a valid token and allowed to use the API.
| # Extract OAuth token from request headers |
| if "Authorization" in self.request.headers: |
| token = self.request.headers["Authorization"].split(" ")[1] |
| else: |
| self.response.status = 401 |
| self.response.out.write(createError(401, "Request requires authentication")) |
| return |
| # Build a service object to access our Mirror API, and set it up |
| # to use the OAuth token from the request |
| credentials = AccessTokenCredentials(token, "mirror-api-upload-handler/1.0") |
| http = httplib2.Http() |
| http = credentials.authorize(http) |
| service = build("mirror", "v1", http=http, discoveryServiceUrl=discoveryServiceUrl) |
| try: |
| # Insert new timeline item in the API with the decoded (maybe empty) information |
| item = service.timeline().insert(body=iteminfo).execute() |
| except HttpError as e: |
| # This catches all errors that might be related to invalid authentication |
| # and also to wrong/malformed information in the item information |
| self.response.status = e.resp.status |
| self.response.out.write(e.content) |
| return |
Warning:
The files.blobstore.create method used here has been deprecated (but still functional at the moment),
so I will be moving over to Google Cloud Storage for this functionality
and update this part of the article once this is done.
| file_name = files.blobstore.create(mime_type=attachment_type) |
| with files.open(file_name, 'a') as f: |
| f.write(attachment) |
| files.finalize(file_name) |
| blob_key = files.blobstore.get_blob_key(file_name) |
We can take the item we create via the API, add the additional information about the attachment with the blob_key as id, and update the timeline item via another API call. We use an internal API method for this, since end-users of the API shouldn't be able to manipulate the attachment information directly. We also provide a contentUrl together with the attachment, which is a URL constructed from both the timeline item id and the attachment id. This URL will be handled by our download handler described below to serve the blob.
| attachment = { |
| "id": str(blob_key), |
| "contentType": attachment_type, |
| "contentUrl": "%s/upload/mirror/v1/timeline/%s/attachments/%s" |
| % (base_url, item["id"], str(blob_key)) |
| } |
| # Add attachment information to item description |
| item["attachments"] = [attachment] |
| try: |
| # Update the timeline item with the attachment information via the API |
| updated_item = service.internal().timeline().update(id=item["id"], body=item).execute() |
| except HttpError as e: |
| self.response.status = e.resp.status |
| self.response.out.write(e.content) |
| return |
| # Return the full item information as response |
| self.response.status = 200 |
| self.response.out.write(json.dumps(updated_item)) |
While serving a blob is easy, in our case we want to make sure that only authenticated users have access to their own attachments and no others. So some extra work is necessary here.
| class DownloadHandler(BlobstoreDownloadHandler): |
| def get(self, id, attachment): |
| # Extract OAuth token and create API service object as explained above |
| if "Authorization" in self.request.headers: |
| token = self.request.headers["Authorization"].split(" ")[1] |
| else: |
| self.response.status = 401 |
| self.response.out.write(createError(401, "Request requires authentication")) |
| return |
| credentials = AccessTokenCredentials(token, "mirror-api-upload-handler/1.0") |
| http = httplib2.Http() |
| http = credentials.authorize(http) |
| service = build("mirror", "v1", http=http, discoveryServiceUrl=discoveryServiceUrl) |
| # Trying to get timeline item via the API |
| # This will cause an error when the current user is not allowed to access the item |
| # or the item has been deleted |
| try: |
| item = service.timeline().get(id=id).execute() |
| except HttpError as e: |
| self.response.status = e.resp.status |
| self.response.out.write(e.content) |
| return |
| # Check whether the requested blob/attachment exists |
| if not blobstore.get(attachment): |
| self.response.content_type = "application/json" |
| self.response.status = 404 |
| self.response.out.write(createError(404, "Attachment not found")) |
| return |
| # Return the full blob/attachment data as response |
| self.send_blob(attachment) |
Having everything run nicely in the emulator using the Mirror API clone is okay, but in the end our goal is to have our application run in the real Mirror API with real Glass as well. For this I've come up with an application layout that makes changing from clone to real as easy as possible. The idea is that URLs of the form yourapp.appspot.com/something will access the real Mirror API and communicate with a real Glass device while URLs of the form yourapp.appspot.com/test/something will use the Mirror API clone and will communicate with the emulator.
For that we can for example define the routes of the webapp2.WSGIApplication like this:
| ROUTES = [ |
| (r"(/test)?/something", SomethingHandler), |
| (r"(/test)?/somethingelse", SomethingElseHandler) |
| ] |
Our request handlers then gets either "/test" or None passed as argument
and we can react accordingly. The only real difference we have to make is to direct our API calls to the correct API,
and with the Google APIs Client Library for Python that's just
a matter of passing different parameters to the build method to get the service object. By default this method
will try to find the API in Google's own API directory, but we can tell it
to use our own APIs Discovery Service which comes with Cloud Endpoints by providing a discoveryServiceUrl that looks like this:
https://yourapp.appspot.com/_ah/api/discovery/v1/apis/{api}/{apiVersion}/rest
| class SomethingHandler(webapp2.RequestHandler): |
| def get(self, test): |
| # Retrieve credentials for the current (Test-)user |
| credentials = get_credentials(test) |
| http = httplib2.Http() |
| http = credentials.authorize(http) |
| if test is not None: |
| # Use Mirror API clone |
| service = build("mirror", "v1", http=http, discoveryServiceUrl=discoveryServiceUrl) |
| else: |
| # Use the real Mirror API |
| service = build("mirror", "v1", http=http) |
| # Use the API, this will automatically direct the calls to either the real API or clone. |
| items = service.timeline().list().execute() |
The same will work for other API clients like the JavaScript client libraries, again simply by building the client library with the discovery document of either the real Mirror API or our clone. Since we built our clone to be an exact copy, all calls will work exactly the same, except for...
As explained above media uploads aren't currently supported by Cloud Endpoints, and while we managed to build our own handlers for that, they are not really a part of our API, and thus can't be used from the client libaries. For that reason we need helper functions, to either directly use the client library for accessing the real API, or constructing appropriate requests to our media upload handlers to perform the same tasks.
Here an example of how the upload function I did for Python looks like, that we can call instead of directly using the client library:
| def multipart_insert(metadata, attachment, attachmentType, test): |
| """Insert a new card with metainfo card and media.""" |
| if test is None: |
| # Use the functionality of the API Client library to directly send multipart request |
| media = MediaIoBaseUpload(io.BytesIO(attachment), attachmentType, resumable=True) |
| result = service.timeline().insert(body=metadata, media_body=media).execute() |
| return result |
| # Construct the multipart upload for test environement |
| base64_data = attachment.encode("base64").replace("\n", "") |
| multipart_body = "\r\n--" + BOUNDARY + "\r\n" |
| multipart_body += "Content-Type: application/json\r\n\r\n" |
| multipart_body += json.dumps(metadata) |
| multipart_body += "\r\n--" + BOUNDARY + "\r\n" |
| multipart_body += "Content-Type: " + attachmentType + "\r\n" |
| multipart_body += "Content-Transfer-Encoding: base64\r\n\r\n" |
| multipart_body += base64_data |
| multipart_body += "\r\n\r\n--" + BOUNDARY + "--" |
| headers = {} |
| headers["Content-Type"] = "multipart/related; boundary=\"" + BOUNDARY + "\"" |
| # Send request to our upload endpoint |
| result = service._http.request( |
| base_url + "/upload/mirror/v1/timeline", |
| method="POST", |
| body=multipart_body, |
| headers=headers |
| ) |
| return result |
So there you have it, everything you need to develop your first Glassware, if, like me, you don't have access to the real thing yet. Don't let Google's US restrictions keep you from being at the front of this new wave of wearable computing, and be prepared to launch as soon as you can. All the information you need is out there, use it and have fun! For me it's been a fun ride, and as with most of my projects a huge learning experience as well, and I hope you learned a thing or two from this article as well :)
Glass and Google+ are trademarks of Google Inc. Use of these trademarks is subject to Google Permissions.
This site is not affiliated with, sponsored by, or endorsed by Google Inc.
This work is licensed under a Creative Commons Attribution 3.0 Unported License.